6 Step Process to Learning Any Scale on Guitar
Learning scales on the guitar. This is something that a lot of people would agree is necessary, but unfortunately, a lot of guitar players find this to be very frustrating and boring.
Having a basic knowledge of scales allows you to do a lot of things on guitar, such as improvising, or writing your own guitar harmonies.
This article will address the reasons guitar players often find the process boring and frustrating, and also provide a set of solutions, so that you have some new approaches to learning scales, can create more freedom and creativity in your guitar playing and also learn scales faster than you ever have before.
A lot of guitar players wish they could play scale runs up and down the neck, but before you can do that, you have to master this step of playing guitar.
We will cover playing through a scale and being able to move a scale around the neck and use it more creatively, but we will not cover learning the theory behind how scales function – that is a topic for another day!
Why do guitar players often find this frustrating?
So why can learning scales be a frustrating process? Quite often, guitar players lose sight of why they are learning scales, and learn scale patterns for the sake of it. There should be a reason behind everything that we do. In the case of learning scale patterns, we are training our fingers to be able to recognise specific patterns on the guitar, that we can use to create a certain emotion in the music that we play. If we lose sight of that and just practice playing scales over and over… we get really good at playing the notes in a scale one after the other, but we don’t improve our ability to create music, improvise, or increase our musical freedom. Which is the point of learning the scale!
Why are learning scales usually boring?
It is often because guitar players take a very repetitive approach to learning scales. Playing a pattern over and over can seem like an effective way to learn a scale… but it isn’t. Playing a pattern over and over is an effective way to start learning a scale. What is the starting point is often taken to be the entire process. When learning a new scale, we need to attack it from multiple angles. This is not only the fastest way to learn, but also the most effective, as it helps us think of different ideas for actually using the scale in a musical context. It also forces us to keep our brain actively engaged in what we are doing and not go on autopilot.
As you can see, the two above problems are caused by using a flawed and limited process.
So let’s fix those problems, and make learning new scales more fun and more effective!
We will break the process for learning to play new scales into 6 steps:
6 Steps You Can Use To Learn Any Scale On Guitar
Step 1: Memorise the scale pattern
We have to start somewhere. And we’ll start with the step that most guitar players only use, but with a twist. Play the pattern you are learning 50 times up and down starting on the following frets:
- 3
- 7
- 5
- 9
- 12
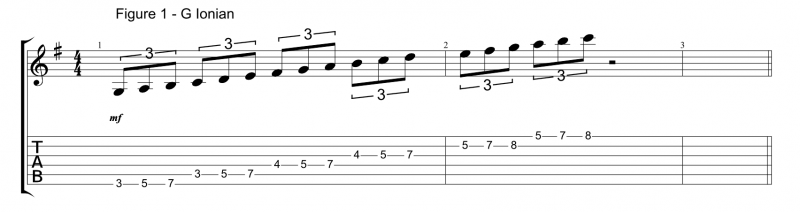
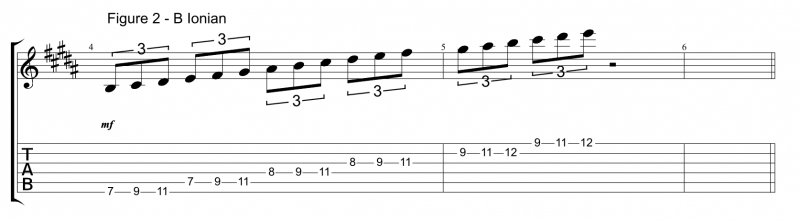
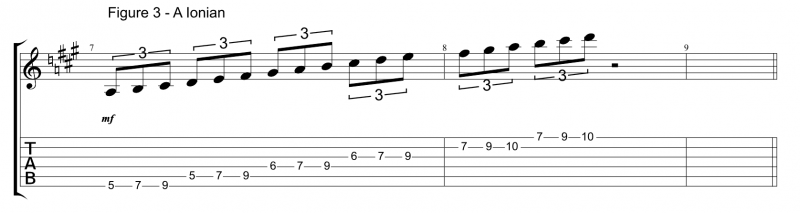
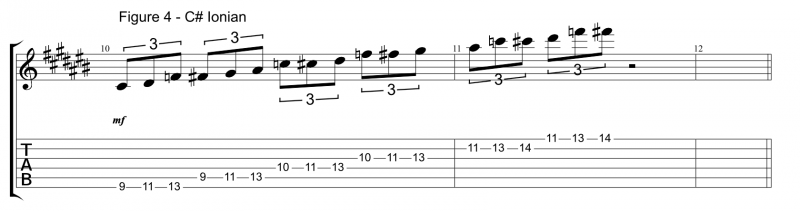
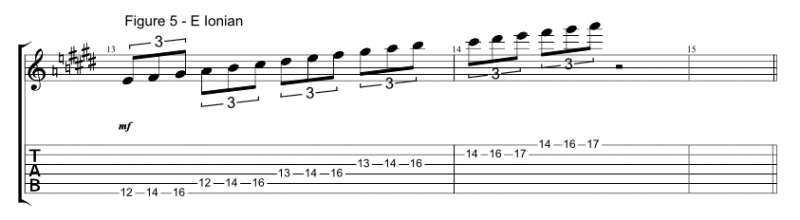
Moving the pattern around like this prevents you from “key isolation”, which is where guitar players get really good… at playing in one key. I’ve included tab examples using the Ionian three note per string pattern:
Step 2: Sing, or hum, along to the notes
For this next step, we are going to take a similar approach to what we did in the previous step, but we are focussing on something different. Previously, we were focussed on mechanically making our fingers hold down the notes. Now, we are going to shift our focus to the sound of each note. Play through the notes one at a time. Do not focus on moving to the next note. You are going to sing, or if you prefer, hum, each note that you play. You are not focussed on moving from note to note here, but on giving each note enough time, so that you can accurately hum its pitch. If it means playing the note over and over for 2 minutes while you “tune in” to it, then you play that note for 2 minutes, over and over. This time we are going to go up and down each scale five times (as your vocal range allows), starting from the following frets:
- 7 (B) - 3 (G) - 9 (C#) - 5 (A) - 12 (E)
I have changed the order a little bit to keep your brain actively engaged, and prevent you going on “auto pilot”. As soon as you go on autopilot, you stop learning.
If you need a tab to guide you, use the tabs from Step 1.
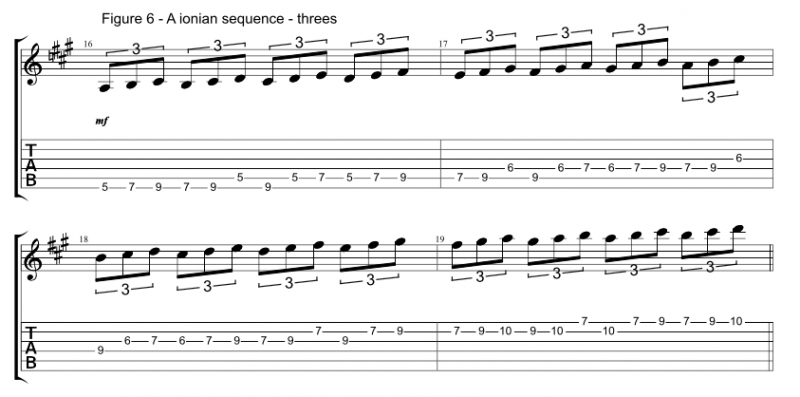
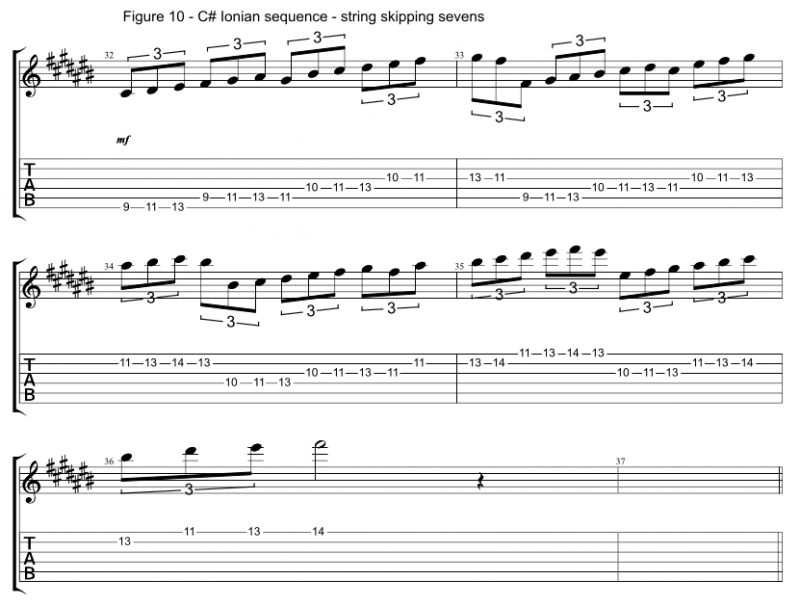
Step 3: Play sequences through the scales
The next step we are going to take is to break out of playing the notes in the scale one after the other, using some simple sequences. This helps us to:
- Break out from playing a single linear sequence through the notes, so we do not “program” ourselves to approach the scale that way when we go to play it
- Start experimenting with some different sounds in the scale
- Start experimenting with different time divisions through the scale
This is also quite fun to practice, as you get something you can use musically, as well as start building some speed!
Below are some sequences you can experiment with using:
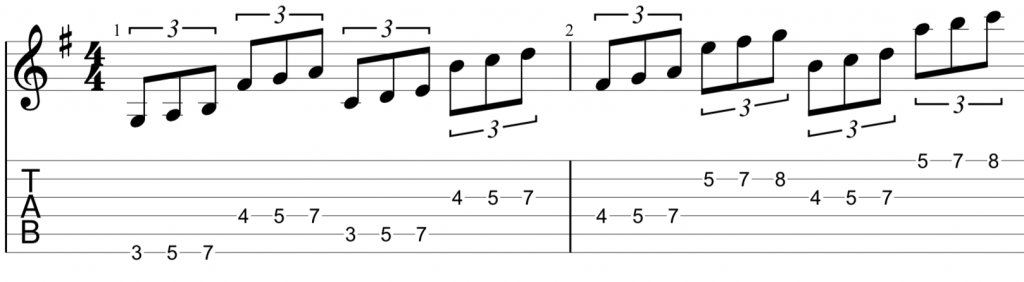

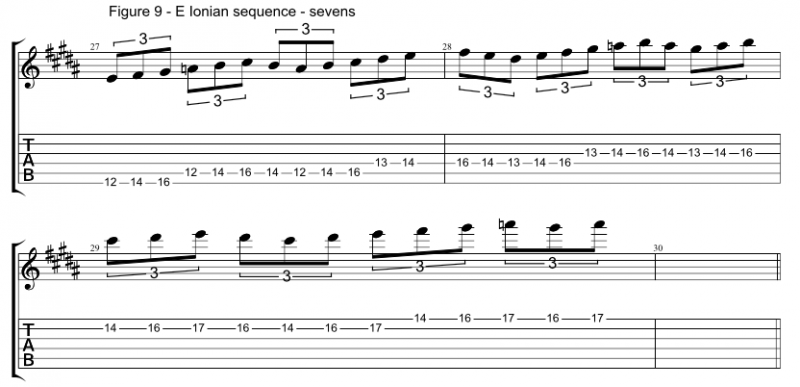
Have a go at making up some of your own sequences.
Step 4: Memorise where the root notes go
The next step is memorising where the root notes in the scale are. This is important for when we start using the scale creatively with improvising. There are several ways you can do this. One way is to copy out a neck diagram for the scale you are using, using a different symbol or colour for the root note, as I have done in the following example. It doesn’t matter which method you use, this is just to illustrate the point that there are different ways to mark the root note:
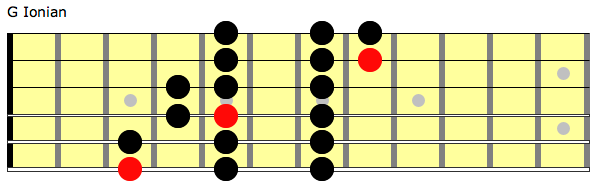
Side note: If you ever wanted a way to practice your guitar playing without your guitar… this is perfect. Copying out scale diagrams when you are on the bus / train etc, is a great way to improve your scale visualisation.
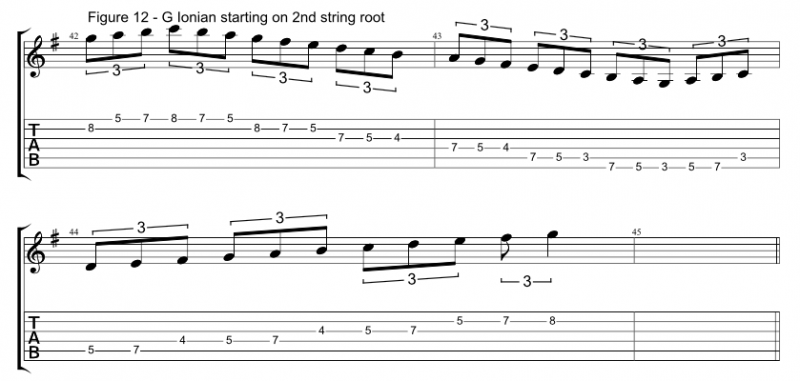
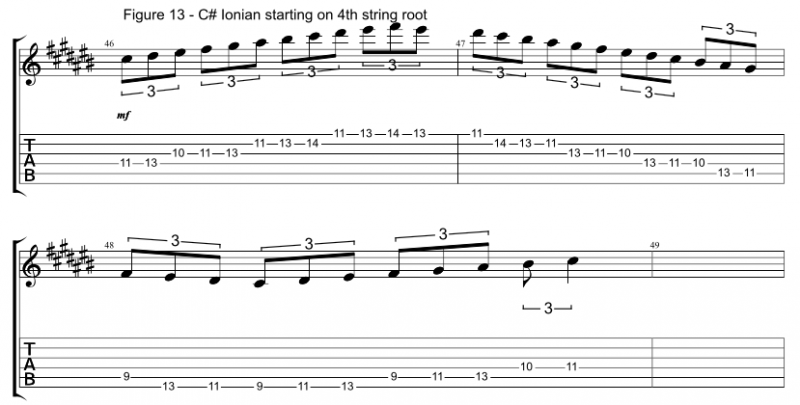
Step 5: Practice playing the scale from the root notes
I’m sure you have had the following problem when learning scales: You learn a new scale. You get excited. You want to improvise with it / use it musically. And every time you go to use the scale, mentally, and sometimes physically, you are always “starting” from the root note on the 6th string. We are going to make sure you never have that problem! This is usually caused by the learning process stopping at step 1. But, by moving on to the following technique, we are going to make sure that you have a lot more freedom to creatively use these scales - which is the entire point of learning them in the first place!
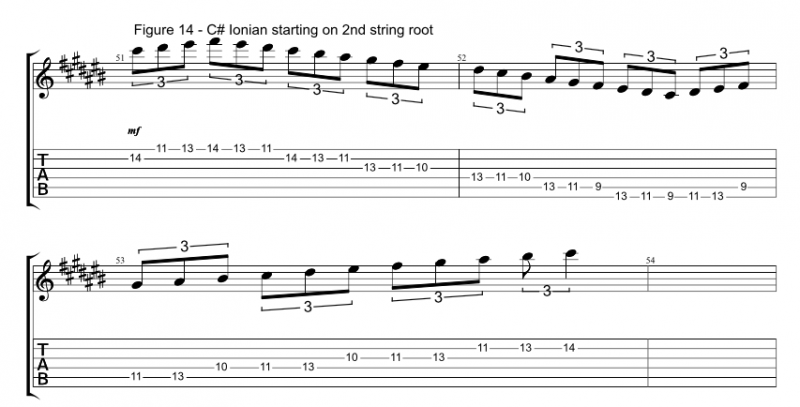
So here are some exercises to give you that ability. Note that in the 3 note per string Ionian shape, the root note occurs 3 times. We have already practiced moving from the 6th string root note, so these exercises will focus on the 2nd and 4th string root notes. I’ve given examples in G Ionian and C# Ionian, you should be able to use these exercises and transpose to A, B and E:

Step 6: Improvise over some back tracks from the root notes
This step is the most fun! Grab some backing tracks and start improvising in the different keys we looked at. If you are not sure on how to improvise… just have a go at playing the scale from different roots. Change the rhythm you use. Don’t worry about how it sounds to start off with, just play around with it. Have fun :)
Key Take-Aways
- Practice your scales in different keys
- Play different patterns in your scales
- Always practice your scales with different objectives (e.g. learning the root notes, improvising, memorising the pattern)